The "Wait for the Spots" Master Recipe
Unlock the secret to the most intense, caramelized banana flavor with the 'Wait for the Spots' method. This master recipe guarantees a moist, dense crumb and natural sweetness that only patience can provide.
If there is one rule I live by in my kitchen, it is this: Patience is an ingredient.
We’ve all been there—staring at a bunch of yellow bananas on the counter, willing them to ripen faster so we can bake. But the “Wait for the Spots” Master Recipe isn’t just a catchy name; it is a culinary directive. To achieve the deep, molasses-like sweetness and the dense, moist crumb that defines a world-class loaf, you simply cannot rush the biology of the fruit.
The Science of the Spot
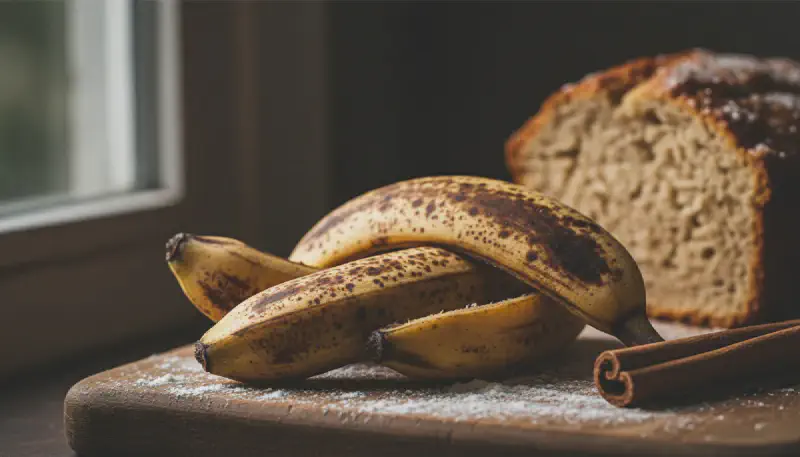
Why do we wait for the spots? When a banana is yellow, it is primarily starch. Starch provides structure but lacks sweetness and moisture. As the banana ripens and develops those unsightly brown freckles (and eventually turns entirely black), an enzymatic process converts those starches into fructose and glucose.
This conversion does two things for our baking:
- Natural Sweetness: It reduces the amount of added refined sugar we need.
- Hygroscopy: The high sugar content attracts and holds water, ensuring your loaf stays moist for days.

As you can see above, when you mash bananas at this stage, they shouldn’t be dry or pastel yellow. They should be glossy, aromatic, and almost liquid. This is the “liquid gold” base of our recipe.
Structuring the Perfect Loaf
While the bananas do the heavy lifting regarding flavor, the supporting cast is equally important.
Butter vs. Oil
For this master recipe, I opt for melted butter. While oil produces a technically moister cake, butter provides a rich, creamy mouthfeel and a flavor profile that complements the caramel notes of the brown sugar. Because we are using ultra-ripe fruit, we don’t need the oil to compensate for dryness.
The Sugar Choice
We strictly use Dark Brown Sugar. The molasses content in brown sugar adds acidity (which reacts beautifully with the baking soda) and a depth of flavor that white sugar simply cannot achieve. It also contributes to that gorgeous, dark mahogany crust.
Sarah’s Secret Tip: The “Day Two” Rule
Here is a secret that separates home bakers from professionals: Do not eat the bread immediately.
I know, the smell is intoxicating. You will want to slice it while it’s steaming. However, banana bread is high in moisture and sugar. If you wrap the cooled loaf tightly in plastic wrap and let it sit at room temperature overnight, the moisture redistributes. The flavors meld, the crust softens slightly into a sticky, caramelized delight, and the banana flavor intensifies significantly.
Eat one slice fresh if you must, but save the rest for Day Two. You will thank me.
Frequently Asked Questions
1. Can I use frozen bananas?
Absolutely. I keep a “graveyard” of black bananas in my freezer. Thaw them completely in a bowl before using. Crucial Step: They will release a lot of liquid while thawing. Do not discard this! Include it in the batter, as it is packed with flavor and sugar.
2. My banana bread is always soggy in the middle. Why?
This usually happens for two reasons. First, your oven temperature might be too high, cooking the outside before the inside sets (invest in an oven thermometer!). Second, your bananas might have been too large. If you have massive bananas, measure out 1.5 cups of mash to ensure the ratio of wet to dry ingredients remains correct.
3. Can I add nuts or chocolate chips?
Yes, this is a “Master” recipe, meaning it is a blank canvas. You can fold in up to 3/4 cup of walnuts, pecans, or semi-sweet chocolate chips. Toss your add-ins in a teaspoon of flour before folding them in to prevent them from sinking to the bottom.
4. How long does this keep?
Because of the high moisture content from the spotted bananas, this loaf keeps at room temperature in an airtight container for 3 to 4 days. In the refrigerator, it can last up to a week, though the cold may alter the texture slightly.
5. Can I make this gluten-free?
This recipe is very forgiving. You can swap the all-purpose flour for a high-quality 1:1 Gluten-Free Baking Flour blend (one that contains xanthan gum) with excellent results. The moisture from the fruit helps prevent the dry, crumbly texture often associated with GF baking.
The "Wait for the Spots" Master Recipe
Ingredients
Instructions
- Preheat and Prep: Preheat your oven to 350°F (175°C). Grease a 4x8-inch loaf pan with butter or line it with parchment paper for easy removal.
- The Mash: Peel the bananas. In a large mixing bowl, mash them vigorously with a fork or potato masher. Do not puree; leave small chunks for texture.
- Wet Ingredients: Stir the melted butter into the mashed bananas. Whisk in the brown sugar, egg, and vanilla extract until the mixture is glossy and combined.
- Dry Ingredients: Sprinkle the baking soda, salt, and cinnamon over the wet mixture. Stir gently. Add the flour last, folding with a spatula just until the streaks of flour disappear. Do not overmix.
- Bake: Pour the batter into the prepared loaf pan. Bake for 55 to 65 minutes. A toothpick inserted into the center should come out clean or with a few moist crumbs, but no raw batter.
- Cool: Let the loaf cool in the pan for 10 minutes, then transfer to a wire rack to cool completely before slicing.
Nutrition
Calories: 290 kcal | Protein: 4 g | Fat: 10 g | Sugar: 18 g